Friday, August 31, 2012

The Roasted Brussel Sprout

I am sure some of you saying to yourself, there is a typo in her blog name. I know that!  I actually forever thought it was called Brussel Sprouts not Brussels Sprouts.  It was one of my mom and grandma's favorite dishes at Christmas time. My mom always served them roasted in one of her beautiful pottery bowls that she picked up on Cape Cod many moons ago.  My mom always said it wasn't Christmas without Brussels Sprouts. 
Recently, I rediscovered Brussels Sprouts as a food one Christmas when I was trying to recreate my mom's Christmas meals that I missed so very much (my mom passed away six years ago).  When I was shopping for them in the grocery I noticed the sign, Brussels Sprouts.  Well I'll be darned, all of those years calling it a Brussel Sprouts when it really was Brussels!
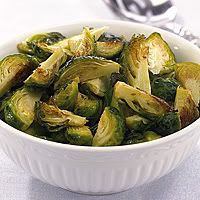
They have quickly grown to become one of my favorite vegetables in the winter and through the year when I can find them.  I LOVE them quatered, roasted with a little bit of Wegman's Basting Oil and sprinkled with sea salt.  However, my boys prefer them raw, au natural! These are the same boys that like raw cabbage, okra and turnips (my kids are weird). 
PhotobucketSo the name fits!  It reminds me of my mom and grandma who were two of the best cooks I knew and who both inspire me so much to spend the time creating and working hard to feed my family healthy foods.  It connects my love of cooking with my love of gardening.  And it is a little quirky and different which I kind of like.  So there explains the name. 


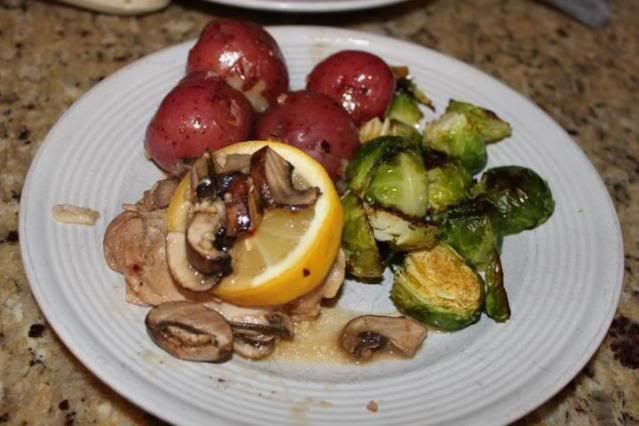
Boiled Red Potatoes, Rosemary Lemon Chicken, and Roasted Brussels Sprouts


Wegmans Recipe for Roasted Brussels Sprouts

Roasted Brussels Sprouts recipe and reviews

2 Tbsp Wegmans Basting Oil  (I used a little less)
Salt (sea salt) and pepper to taste

Directions:
Preheat oven to 450 degrees.
  1. Toss Brussels sprouts and basting oil together in large bowl; season to taste with salt and pepper. Spread in single layer on baking sheet. (I put on parchment paper or foil)
     
  2. Roast on center rack of oven 20-25 min, turning once, until slightly browned and tender when pierced with knife tip.
Photobucket

Back to School Cupcakes

On the first day of school, our neighborhood has a little cupcake celebration at one of the community parks.  I saw this adorable back to school cupcake on Pinterest and couldn't resist. I used Betty Crocker's GF Chocolate Cake Mix for the cake. Red Sugar Sprinkes. Gummy worms and gummy leaves. Snyders GF pretzel sticks for the stem.
So cute! 
They got gobbled up in a matter of minutes at the park!
I personally thought they were a little too sugary but the kids seem to like them.

Photobucket

Roasted Corn Soup

I have made this recipe several times and LOVE IT!  I stumbled upon it on pinterest then found it gracing the pages of the latest Williams Sonoma Catalog.
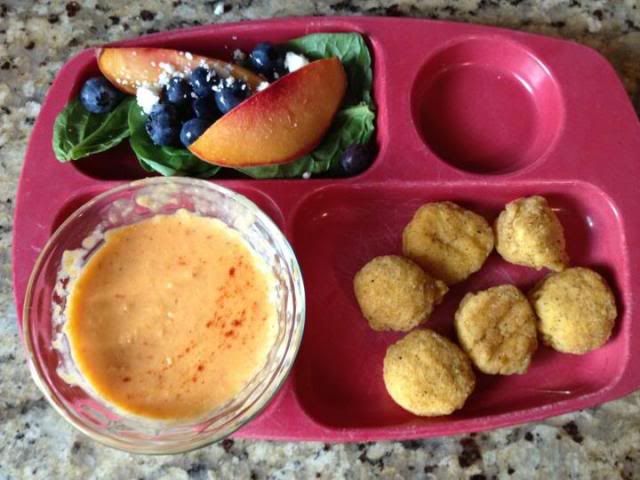
This is my son's dinner plate: Roasted Corn Soup with Wegmans GF Chicken Nuggets, Spinach Salad with baked sliced peaces, blueberries and feta. 
Photobucket
From the Williams Sonoma site: Roasted Corn Soup

This recipe was created by the Sussman brothers, Max and Eli. The chefs started testing the recipe early one morning but Max had to go into work before it was done cooking. He texted Eli a few hours later—“how did the soup turn out?”—and Eli texted him back: “I now know what it feels like to open presents on Christmas morning.”

Ingredients:

  • 2 ripe but firm tomatoes
  • Kernels from 6 ears of fresh corn (about 3 cups)
  • 2 red bell peppers
  • 1 yellow onion, chopped
  • 1 red onion, chopped
  • 3 garlic cloves, minced
  • About 2 1/2 cups low-sodium chicken broth, plus more as needed
  • 1 tsp. chipotle chili powder (I use regular chili powder)
  • 2 Tbs. salt
  • 1 cup heavy cream (I use 1/2 and 1/2)
  • Sliced avocado for garnish
  • Extra-virgin olive oil for drizzling
  • Paprika for garnish

Directions:

Preheat an oven to 375°F.

Put the tomatoes in a lightly greased glass baking dish. Roast until the skins darken and the tomatoes are caramelized, about 30 minutes. Remove from the oven and let cool. Keep the oven on.

Spread the corn in a single layer on a baking sheet. Roast until the edges begin to turn golden brown, 10 to 15 minutes. Meanwhile, when the tomatoes are cool enough to handle, peel off the skins and discard. Set the flesh, with the juices, aside in the baking dish. Remove the corn from the oven and let cool. I'm too lazy to take the skins off the tomatoes.

Place 1 bell pepper on each of 2 gas burners. Turn the burners on high and sear the peppers directly over the flame, using tongs to turn as needed, until the skins are blackened all over, 10 to 15 minutes total. (Or place the peppers under the broiler and broil, turning as needed, until charred and blistered on all sides, about 15 minutes.) Transfer the peppers to a brown paper bag and close tightly. Let stand for 15 minutes, then remove the peppers from the bag. Remove and discard the skins, core and seeds.  Last time, I just roasted the peppers in the oven with the tomatoes and dind't bother searing them on the burner. Didn't remove the seeds or skin either.

In a soup pot, combine the tomatoes, bell peppers, yellow and red onions, garlic and corn, reserving a handful of the roasted corn for garnish. Add just enough broth to cover the vegetables and bring to a boil over high heat. Reduce the heat to medium-high and cook until the vegetables are very tender, about 10 minutes. Stir in the chili powder and salt.

Using an immersion blender, blend the soup until smooth.  I don't blend until smooth, we like ours still a bit chunky (we like texture). While blending, slowly drizzle in the cream. Ladle the soup into individual bowls. Garnish each portion with a couple of avocado slices, a few drops of olive oil, a scattering of the reserved roasted corn and a sprinkle of paprika. Serve hot. Serves 4.

Adapted from This is a Cookbook, by Max Sussman and Eli Sussman (Olive Press, 2012).
Photobucket
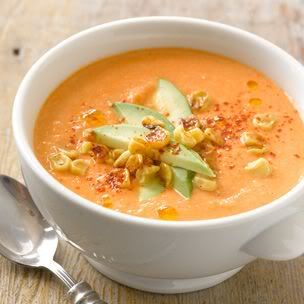
The photo of Roasted Corn Soup that graces the Williams Sonoma site and Pinterest. Doesn't this look yummy?

Lunch Containers

My oldest son is gluten free. I find myself packing his lunch nearly every day of school each month unless it is Nacho day.  I recently found these containers at our local grocery store work REALLY well for his school lunch, fit in his lunch box and come with an attachable cold pack.  Rubbermaid Lunch Blox  I use these along with silicone baking cups I found at a local Williams Sonoma Outlet.  For my younger son that just takes snack to school for Kindergarten each day, we use this container with an attachable ice pod: Aladdin Chill Snack
Photobucket
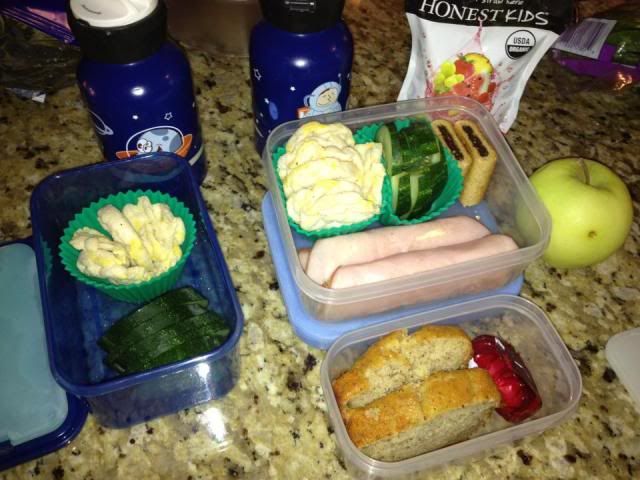
Aladdin container on LEFT, Rubbermaid container on RIGHT
In Blue Aladdin container: Quaker salt and pepper rice cakes, cucumbers from the farmer's market.
In Rubbermaid container: Quaker salt and pepper rice cakes, cucumbers, Fig Newmans (not GF but wheat free), nitrate free organic Applegate ham and Organic Yogurt cheese roll cups, apple.  In small container, Babybel cheese circle and 2 slices on GF Banana Bread made from Pamela's Mix.